
As you already know QuickBooks is a favorite accounting software among millions of small businesses. However, there are those who still uses Google Sheets and Microsoft Excel for their accounting needs. Why use a different software if you can customize QuickBooks and use the features that are hidden from plain sight?
QuickBooks’ structure is universal enough to appeal to millions of small businesses. Custom fields help you shape it to meet your company’s unique needs.
If you’re using QuickBooks, you probably know that you’re complying with the rules of double-entry accounting. The software is designed such that you can be compliant with these requirements without even being aware of it. You’re dealing with invoices and purchase orders, bank account reconciliation and bill-paying and payroll, not debits and credits and journal entries. QuickBooks does the double-entry part in the background.
While every business that uses QuickBooks is following those same rules, each has its own unique structure and its own need to modify some elements of the program to do certain tasks, for example:
This is where custom fields come in.
Defining Custom Fields
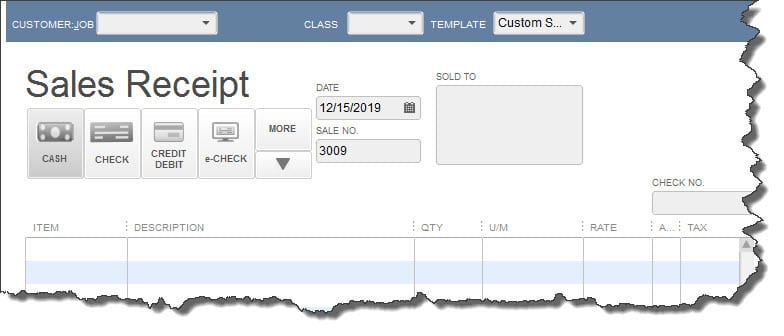
Figure 1: QuickBooks comes with pre-designed form and record templates.
One of the ways that QuickBooks simplifies your life as your company’s accounting manager is by providing pre-designed record and form templates. Need to create an invoice? There’s a form that already contains the most commonly-used data fields; you just fill in the blanks or select from drop-down lists. Want to store information about your customers and about the items you sell? Ditto.
But if you need more fields than QuickBooks offers on a record or form, you can easily add your own. The software lets you add 15 fields total to customers and jobs, vendors, and employees, and you’re limited to seven for any one record type. (If you want to use the same field in two of these, it will only count as one.) And you’re allowed to define up to five fields for your item records.
This type of modification is easy to do, but it’s critical that you think carefully about what fields you should add. You don’t want to learn three or six months down the road that one isn’t really necessary and two more are needed, for example. This is especially important when you’re creating records for inventory items.
You may want to schedule some time with us to go over this (and to explore QuickBooks’ item-tracking features if you’re new to managing inventory). You can change custom field names, but you need to understand how this will affect your data if you do this.
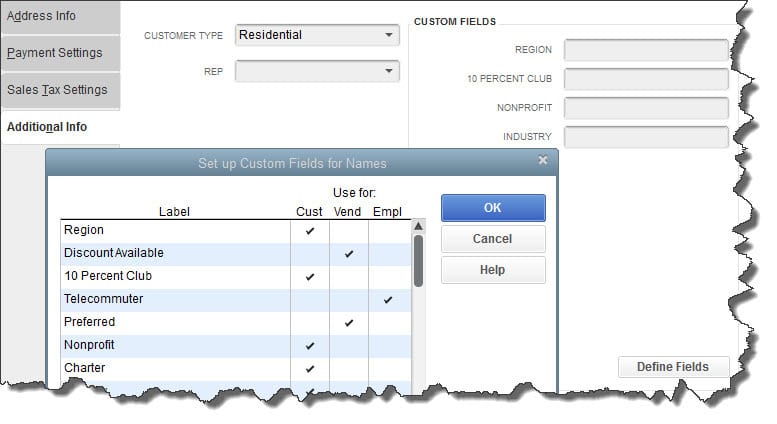
Figure 2: It’s easy to add custom fields to records, but be sure you give a lot of thought to what will be needed.
Let’s say you want to add some custom fields to your customer records. Open the Customer Center by clicking the tab in the left vertical pane or opening the Customers menu and clicking on Customer Center. Double-click on a customer or click on the small pencil icon in the upper right. The Edit Customer window opens.
Click on the Additional Info tab on the left and then on the Define Fields button in the lower right. The Set up Custom Fields for Names window opens, as pictured above.
Click in the first column, under Label. Enter the name of the field as you would like it to appear in records and reports. Then click in the box or boxes below Cust, Vend, or Empl. If you want to use the same field in more than one record type, enter a check mark in both. Continue to enter field names until you’re done, then click OK.
Now when you create a customer record, you can fill in the blanks. And your new fields will appear as filters in some reports.
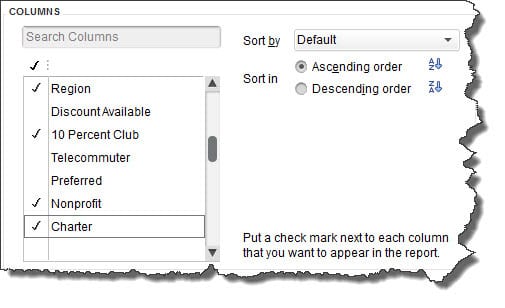
Figure 3: Custom fields can sometimes be used in reports.
You’ll follow a similar set of steps when you create custom fields for items in QuickBooks. Open the Lists menu and select Item List. Double-click on any item to open the Edit Item window. Click the Custom Fields bar on the right, then Custom Fields and Define Fields. If your company sells a lot of products with multiple variations, talk to us before you attempt this.
Personalizing your copy of QuickBooks by adding custom fields has a lot of benefits. But this major structural change requires a lot of thought and planning up front to make sure that this feature is a plus for your business.